
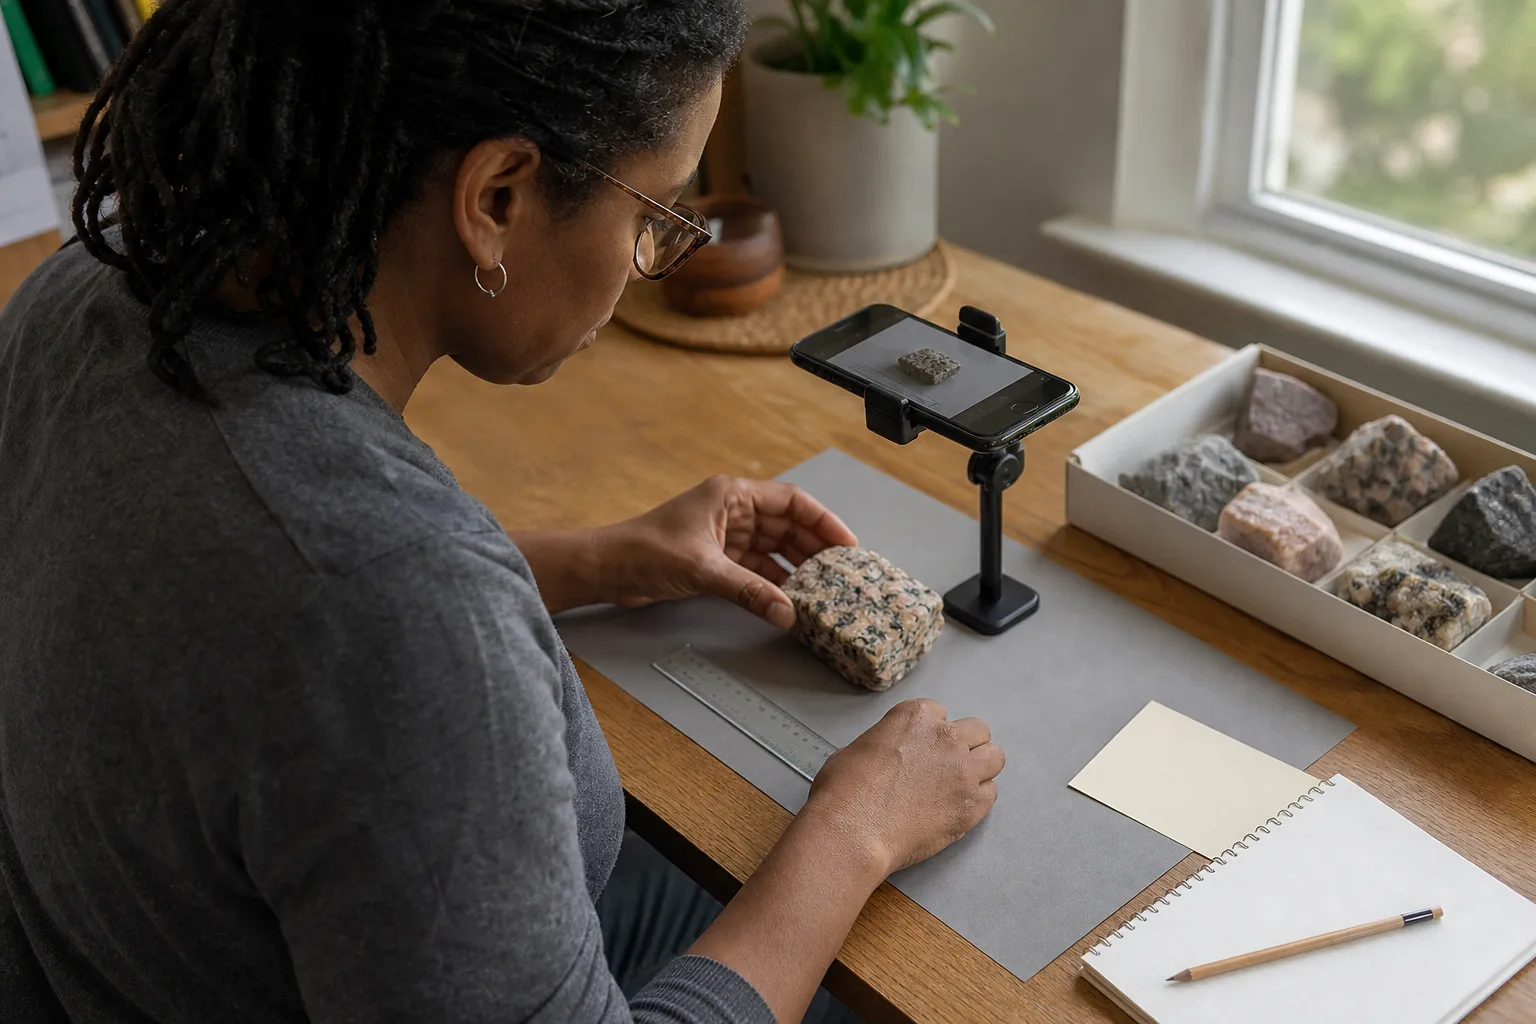
A catalog photograph is not just a flattering picture of a stone. It is a record attached to one physical object.
Years from now, the image should help you answer practical questions: Is this the same specimen? Which face carries the banding or crystal damage? Was that chip already present? Which old label belongs with it? A dramatic close-up may answer none of them. A repeatable set of ordinary views usually answers all of them.
The system below uses a phone, a window, a plain background, a ruler, and the stable specimen number from your catalog. The aim is consistent evidence, not studio perfection.
Catalog photography is different from identification photography
An identification image must concentrate the most useful visible clues into one frame. StoneScout analyzes one selected photo for a scan, so that image should show the specimen clearly without assuming that other angles will fill the gaps.
A collection record has a different job. It can keep several photographs, each with a defined purpose. One proves the specimen number. Another shows the ordinary overall appearance. A third reveals the reverse or profile. A fourth preserves the feature that makes the specimen worth keeping.
Neither kind of photograph proves a mineral identity. A catalog series documents what was visible at a particular time; it does not measure hardness, density, streak, chemistry, or internal structure.
Build one small photo station
Consistency begins with a setup you can recreate in a few minutes:
- a table beside a bright window, out of direct sun;
- a matte white, middle-gray, or muted neutral background;
- a metric ruler with a visible zero mark;
- the specimen’s catalog card;
- a phone stand, small tripod, or two steady hands; and
- a folded white card to soften a dark shadow when needed.
Soft daylight usually gives a more useful overview than direct sun, a bare household bulb, or an on-camera flash. The Canadian Conservation Institute’s photodocumentation guidance treats light, color balance, focus, exposure, file naming, and archiving as parts of one workflow rather than separate finishing touches.
Clean the phone lens and the background. Do not automatically clean the specimen for its portrait. Water, brushes, detergents, and compressed air can alter fragile, soluble, coated, powdery, or unknown material. Photograph its current condition first and investigate safe care separately.
Place the phone roughly parallel to the face you are documenting. Back away if the close-focusing view turns soft, and crop later rather than relying on digital zoom. Review sharpness at full size before returning the specimen to its tray.
Make the same four views every time
Use this sequence for every specimen, adding more only when they answer a real question.
1. Identity and scale frame
Photograph the whole specimen with its catalog card and ruler. Keep the ruler in the same plane as the part you want to measure; a scale several inches behind the stone will appear smaller and mislead. Do not cover an edge or important surface with the card.
This frame is the visual handshake between object and record. It may not be the prettiest image, but it can rescue a set of files whose names were changed or copied into the wrong folder.
2. Clean overview
Remove the catalog card and make one uncluttered view of the specimen in soft, neutral light. Show the face that best represents its ordinary appearance. Leave a little space around the object, keep every edge in frame, and avoid filters or portrait-mode blur.
If you choose a primary collection image, use this one. It should still be recognizable as a record, not an advertisement.
3. Reverse or profile
Turn the specimen once. Choose the reverse when it shows a weathered rind, matrix, attachment point, or a different rock fabric. Choose a low profile when thickness, layering, crystal height, or a repaired base matters more.
This view prevents the front face from becoming the whole story. It also gives you another way to recognize two similar specimens if their display sides look alike.
4. Feature detail
Move closer to the one feature the catalog should preserve: banding, grains, cleavage, a crystal contact, an existing chip, a coating, or a seller’s repair. Keep enough surrounding surface in frame to show where the detail belongs.
Use gentle side light when it helps texture cast small shadows. If you add a backlit or wet-look comparison, caption the lighting or condition clearly and keep the normal dry view as the baseline.
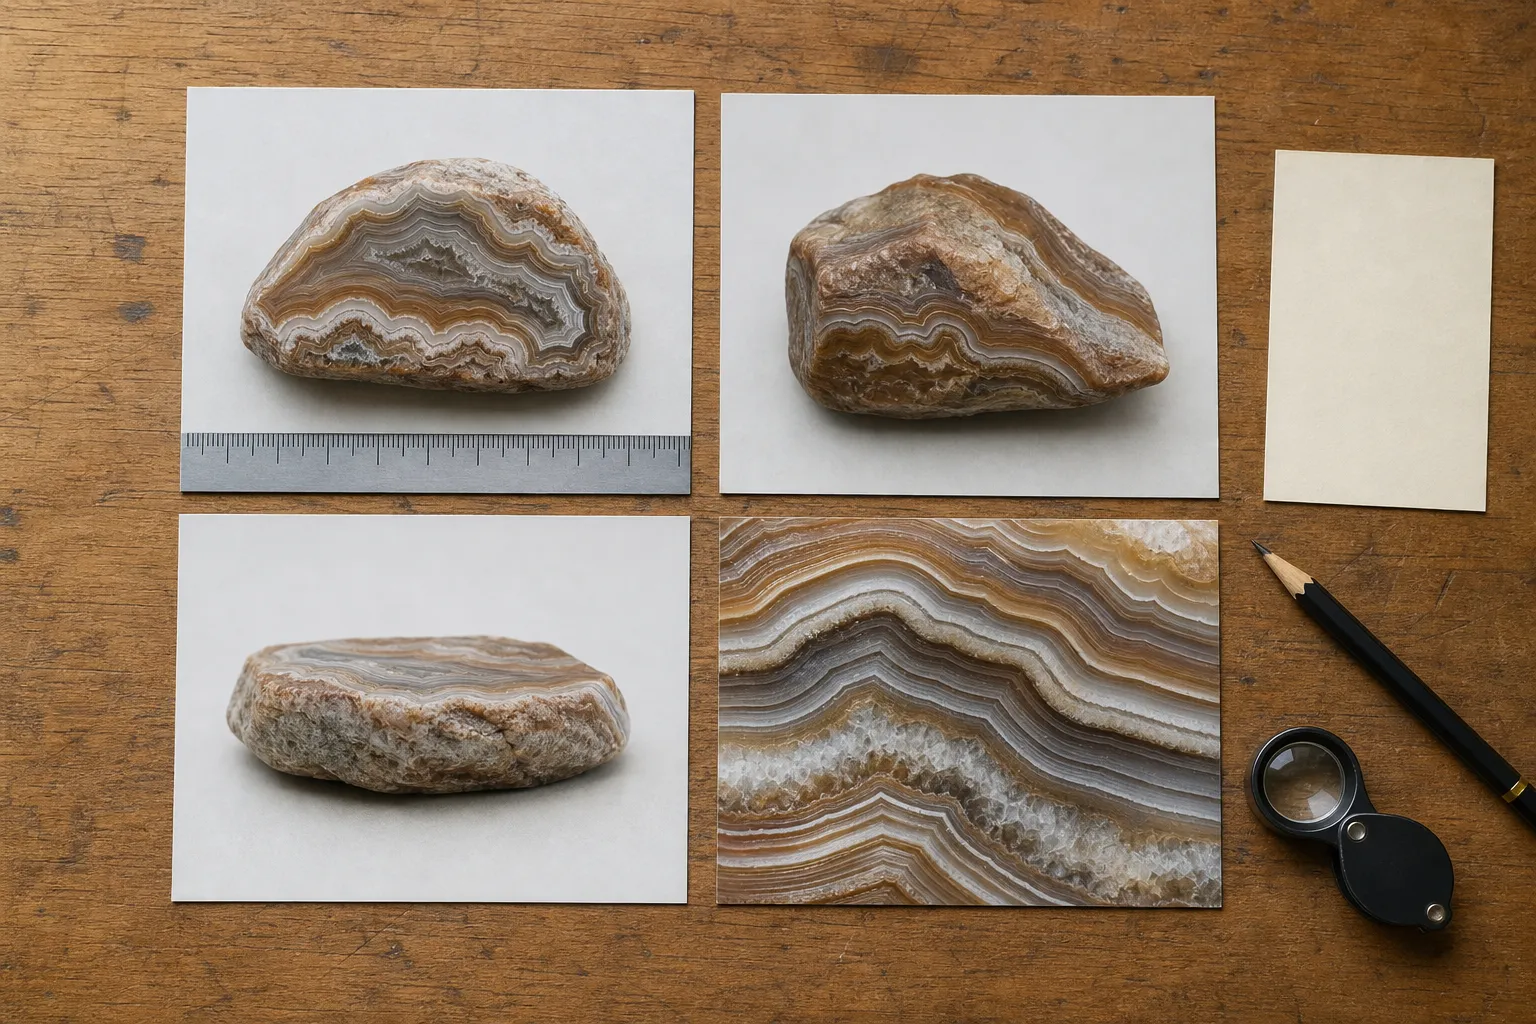
A four-view record is compact but useful: identity and scale, clean overview, reverse or profile, and one purposeful detail.
Use the scale as a reference, not a promise of precision
A ruler helps communicate size only when perspective is controlled. Put it beside the specimen, keep it flat, and include the zero mark. Record the actual dimensions in the catalog as text rather than expecting a future viewer to calculate them from a photograph.
A neutral or gray reference card can also reveal when one session is much warmer or cooler than another, but a home phone setup is not a calibrated color-measurement system. Automatic exposure, white balance, screen settings, and changing daylight all affect appearance. Use the reference to improve consistency, not to claim exact color.
Preserve the original capture. Cropping, rotation, and modest exposure correction can make a working copy easier to view, but heavy sharpening, saturation, background replacement, and object removal weaken the photograph as documentation.
Name the file after the specimen, not your guess
Use the stable catalog number first, followed by the date and view:
SS-0047_2026-08-19_id-scale.jpg
SS-0047_2026-08-19_overview.jpg
SS-0047_2026-08-19_reverse.jpg
SS-0047_2026-08-19_detail-banding.jpg
Do not begin with quartz, valuable, or a drawer number. An identification can change, value is not established by a photograph, and storage locations move. The specimen number remains useful through all three changes.
The Canadian Conservation Institute warns that collections lose value when objects, data, and related materials such as photographs become dissociated. A predictable filename helps, but it is not enough by itself. The catalog record should also list or contain each photograph.
Write captions that add evidence
“Nice side” will not help later. A useful caption identifies the view, feature, and condition without pretending to know more than the image shows:
- “Reverse side with pale weathered rind; dry, diffuse daylight.”
- “Close detail of gray band crossing the cut face.”
- “Small chip at lower edge already present on 2026-08-19.”
- “Original dealer label photographed before storage.”
For each photo, preserve the specimen number, capture date, view, caption, and photographer when more than one person maintains the collection. Record the storage location and identification status in the specimen record, not only in image captions.
The U.S. Geological Survey emphasizes that richer, linked metadata makes a collection more useful and helps provenance remain accessible. The lesson scales down neatly: a photograph without a specimen number is an isolated image; a photograph connected to a catalog record becomes collection evidence.
Repeat the baseline when something changes
Make a new overview and detail image when you acquire the specimen, notice damage, change a mount, discover a coating or repair, or receive a more reliable identification. Keep the earlier photographs and date the new ones.
Try to repeat the background, orientation, distance, and light. Then describe the difference in words. Two phone images made months apart cannot prove a subtle color change unless the workflow was carefully controlled, but they can document an obvious new chip, detached crystal, stain, label change, or repair.
Never create the “after” view by deliberately breaking, polishing, grinding, acid-testing, or cleaning an unknown specimen. Documentation records change; it should not cause it.
Keep the catalog and photographs together—and backed up
Choose one working home for the records: a spreadsheet with an image folder, a collection database, a paper catalog with a digital photo archive, or an app plus an independent copy of essential provenance. Avoid scattering one specimen’s record across camera-roll favorites, messages, unnamed desktop files, and a notebook no one can match.
Back up the catalog and its photographs together somewhere independent of the working device. The Canadian Conservation Institute recommends keeping a backup of electronic or paper inventories off-site so one flood, theft, device failure, or misplaced notebook does not remove both the objects and their history.
StoneScout’s collection can store multiple photos for a saved specimen. You can take a new photo or choose one from the library, write a caption for each, and select the primary image that represents the specimen in your collection. Field notes and an optional find location can hold additional context. Adding collection photos does not rerun or strengthen the original scan; it documents the specimen after it has been saved.
Keep irreplaceable original files and provenance in another form as well. An app is a useful working view, but no single phone, notebook, or service should be the only place the story exists.
A ten-minute intake routine
- Match the specimen to its physical label and stable catalog number.
- Set up the neutral background, diffuse light, ruler, and card.
- Make the identity-and-scale frame.
- Make the overview, reverse or profile, and one feature detail.
- Check focus, edges, glare, and color before moving the specimen.
- Rename the files with number, date, and view.
- Add captions and update the catalog record.
- Back up the record, then return the specimen to its documented location.
For advice on choosing the strongest single image for a scan, use our separate guide to better rock-identification photos. For a collection, the habit that matters most is simpler: photograph the same useful views, name them predictably, and connect every frame to the right stone.
Sources
- Digital Photodocumentation of Museum Objects — Canadian Conservation Institute
- Appendix K: Photography — National Park Service
- Guide to Planning for and Managing Scientific Working Collections — U.S. Geological Survey
- Dissociation — Canadian Conservation Institute
- Framework for Preserving Heritage Collections — Canadian Conservation Institute