
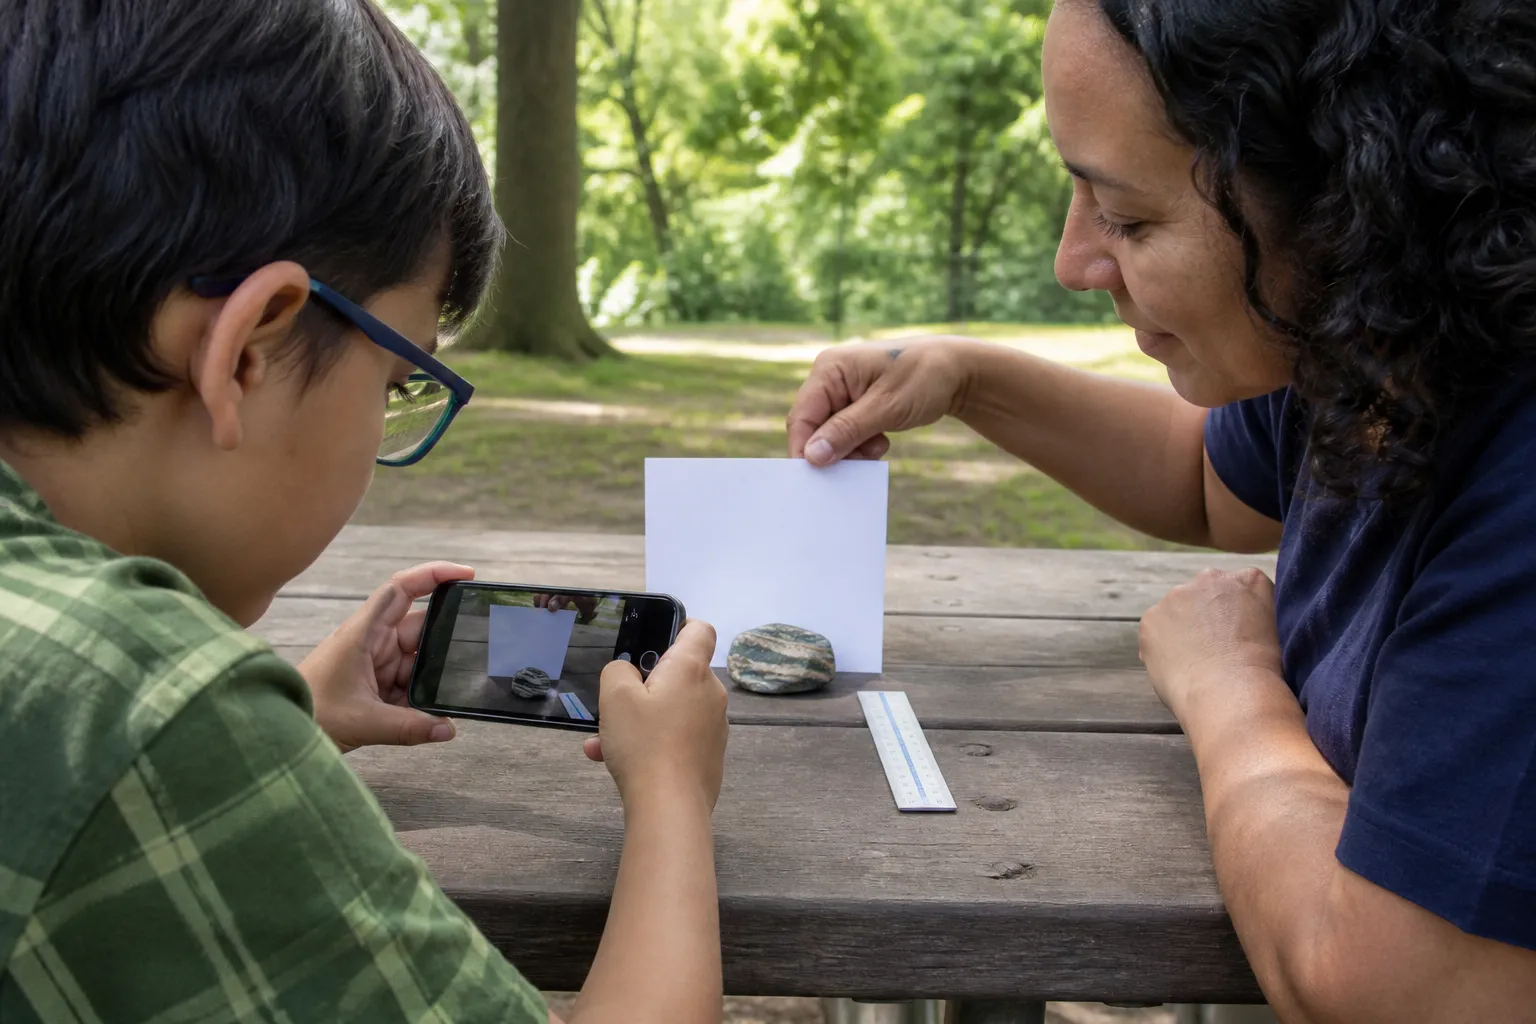
The best rock-identification photo is rarely the most dramatic one. It is the photograph that lets another person inspect the specimen as if it were on the table in front of them.
StoneScout analyzes one photo per scan. It does not combine several angles into one identification. This guide is therefore about choosing the strongest single image: accurate color, sharp texture, a useful face of the specimen, and a visible scale when practical.
You may take a few candidate pictures before choosing that image, and you may keep other angles for your collection notes or an expert. Only the selected photo becomes the evidence for that StoneScout scan. You do not need a dedicated camera or a studio. A phone, diffuse daylight, a plain surface, and two steady hands are enough.
The aim is still a ranked identification, not proof. A better photograph reveals more visible clues, but it cannot measure hardness, streak, heft, chemistry, or internal structure.
Before the close-up, photograph the setting
If the specimen is still where you found it, consider making a wide context photo for your own records. Show the beach, gravel bar, trail cut, garden bed, or exposed rock around it. This is separate documentation: StoneScout will not receive it alongside the close-up used for identification.
Context can separate a loose transported pebble from material weathering out of bedrock. It can also reveal imported landscaping stone or construction fill. Do not move or collect anything until you know who owns the land and what the site allows. National parks generally prohibit recreational collecting, and other public lands, preserves, beaches, mines, and private property each have their own rules.
Build the strongest single frame
One photo cannot show every face, so decide which visible features are most useful before you press the shutter. Arrange one frame that does as many of these jobs as possible:
- Show the most diagnostic face. Choose the side with visible grains, bands, crystals, veins, pores, or other structure—not simply the side with the brightest color.
- Keep the whole specimen visible. Fill most of the frame without cutting off edges. If one feature needs a closer view, keep enough surrounding material to show where it belongs.
- Resolve the texture. Move close enough to see grains or tiny reflective surfaces, but not so close that the camera loses focus.
- Include scale when it fits. Place a small ruler beside the specimen in the same plane without covering it. A ruler communicates size more reliably than a hand or an object of uncertain dimensions.
- Use the dry, ordinary appearance. Water can deepen color and change apparent luster. Do not wet unknown powdery, fibrous, crumbly, metallic, soluble, or encrusted material.
- Remove competing details. Use a plain background and keep fingers, labels, patterned fabric, and unrelated stones out of the identification frame.
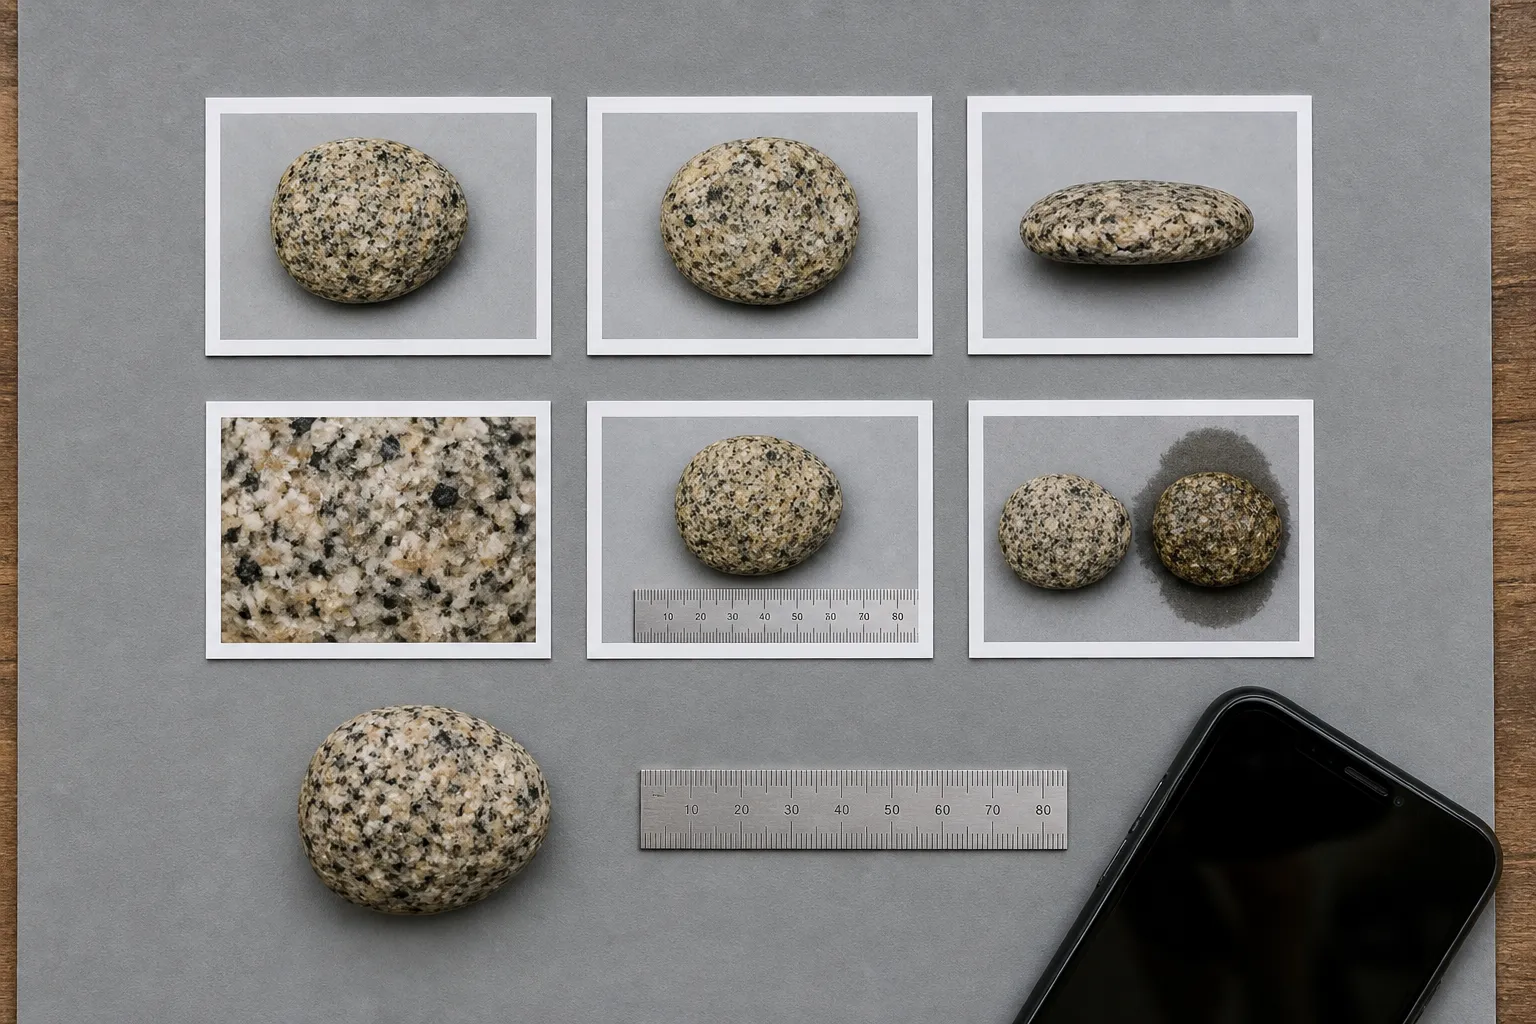
Candidate frames can help you choose the clearest single image. StoneScout does not combine these views into one result.
Use soft, neutral light
Bright noon sun creates black shadows and glaring white highlights. A phone flash can make every shiny grain look metallic while flattening the rest of the surface. Move into open shade or photograph beside a bright window where sunlight does not fall directly on the specimen.
Place a plain white, middle-gray, or muted neutral card near the rock. The camera can use that stable reference when it chooses exposure and color balance, and the background will not cast a strong color onto pale or translucent material. Avoid grass, vivid fabric, patterned countertops, and warm household bulbs when accurate color matters.
To reveal luster in the selected frame, let light arrive slightly from the side. Tilt the specimen gently until its normal reflection is visible, then hold it still. A surface that looks metallic under raking light behaves differently from a dull earthy one. The National Park Service identifies luster—along with hardness, color, streak, cleavage, and specific gravity—as one of the physical properties used to describe minerals.
Get sharp detail without fighting the phone
Wipe the camera lens with a clean soft cloth. Tap the specimen on screen to focus, brace your elbows, and take two or three candidate frames. Review them at full size and submit only the sharpest one. If the phone switches lenses or produces a soft image when you move very close, back away until the texture is sharp and crop later. Digital zoom does not create missing detail.
Keep the phone roughly parallel to the surface you want to document. A steep angle can make a round pebble look elongated and can hide scale. For translucent edges or small crystals, prefer a normal reflected-light image for the scan. You can keep a gently backlit image as secondary documentation, but do not use its glowing color as the specimen’s everyday appearance.
Before submitting, look for motion blur, focus on the background instead of the stone, clipped edges, and highlights that have turned featureless white.
Show size honestly
Put the scale beside the specimen, not in front of it or several inches behind it. Objects at different distances from the camera cannot be compared reliably. Include the zero mark, keep the ruler readable, and state the measurement in notes.
Photographing the stone in a hand can communicate rough size, but hands vary and fingers may cover diagnostic surfaces. Keep that as a collection photo rather than using it as the scan image when a ruler-and-background setup is available.
Photograph differences, not just beauty
If one side has a weathered crust and another shows fresh-looking exposed material, choose the side that best represents the identification question. If a vein crosses the host rock, frame enough of the specimen to show the vein and surrounding rock together. If grains are visible, include several grains so their sizes and boundaries can be compared.
Keep reverse-side, close-up, context, or backlit photos for your personal record or to share with a geologist. After a specimen is saved, StoneScout’s collection can store additional photos, but those images do not revise or strengthen the earlier identification result.
Good identification photography also admits ambiguity. Pale quartz, calcite, feldspar, and weathered glass may overlap in one screen image. Metallic-looking pyrite, chalcopyrite, mica, and man-made slag can fool a single lighting setup. The right response is not stronger certainty; it is a safe, independent observation or help from an expert.
StoneScout uses the one selected image, plus any physical details you enter, as the starting evidence for possible matches. A clear frame makes it easier to judge whether a candidate explains what is visible. Confidence and alternate candidates remain important because the app cannot inspect a hidden reverse side or combine a separate close-up with the submitted photo.
Keep the specimen and yourself safe
Do not clean an unknown by grinding, sanding, wire-brushing, or blasting it with compressed air. Those actions can damage the find and generate dust. CDC/NIOSH guidance emphasizes controlling dust around stone because cutting, grinding, drilling, or crushing silica-containing materials can release respirable crystalline silica.
Avoid touching loose fibers or powder. Set the object down, keep children and pets away, wash your hands after handling ordinary field specimens, and seek local expert guidance if the material is fibrous, strongly staining, unusually crumbly, or associated with mine waste.
Never taste or lick a specimen. Do not apply acid, expose it to flame, or deliberately break it for a photograph.
A reusable field checklist
For the one photo submitted to StoneScout, confirm that it has:
- the most useful face of the specimen;
- the whole specimen or enough context around a diagnostic feature;
- sharply resolved texture;
- a ruler in the same plane;
- neutral daylight and a plain background;
- the dry, ordinary surface appearance; and
- no destructive tests or invented certainty.
Keep context, reverse-side, or alternate-lighting photos separately if they are useful for your collection record or an expert. The scan itself still begins with one honest, carefully chosen image.
Sources
- Minerals and their physical properties — National Park Service
- USGS mineral and rock education resources
- Photography and scientific imaging in gem research — Gemological Institute of America
- Rockhounding and recreational collecting permits — National Park Service
- Safe work practices for crystalline silica — CDC/NIOSH